 Back to site
How we restore your headlights
This is not a quick wipe-down. We do a full multi-step restoration by hand, right in your driveway, and finish with a protective coat so the results actually last. Here is exactly what happens.
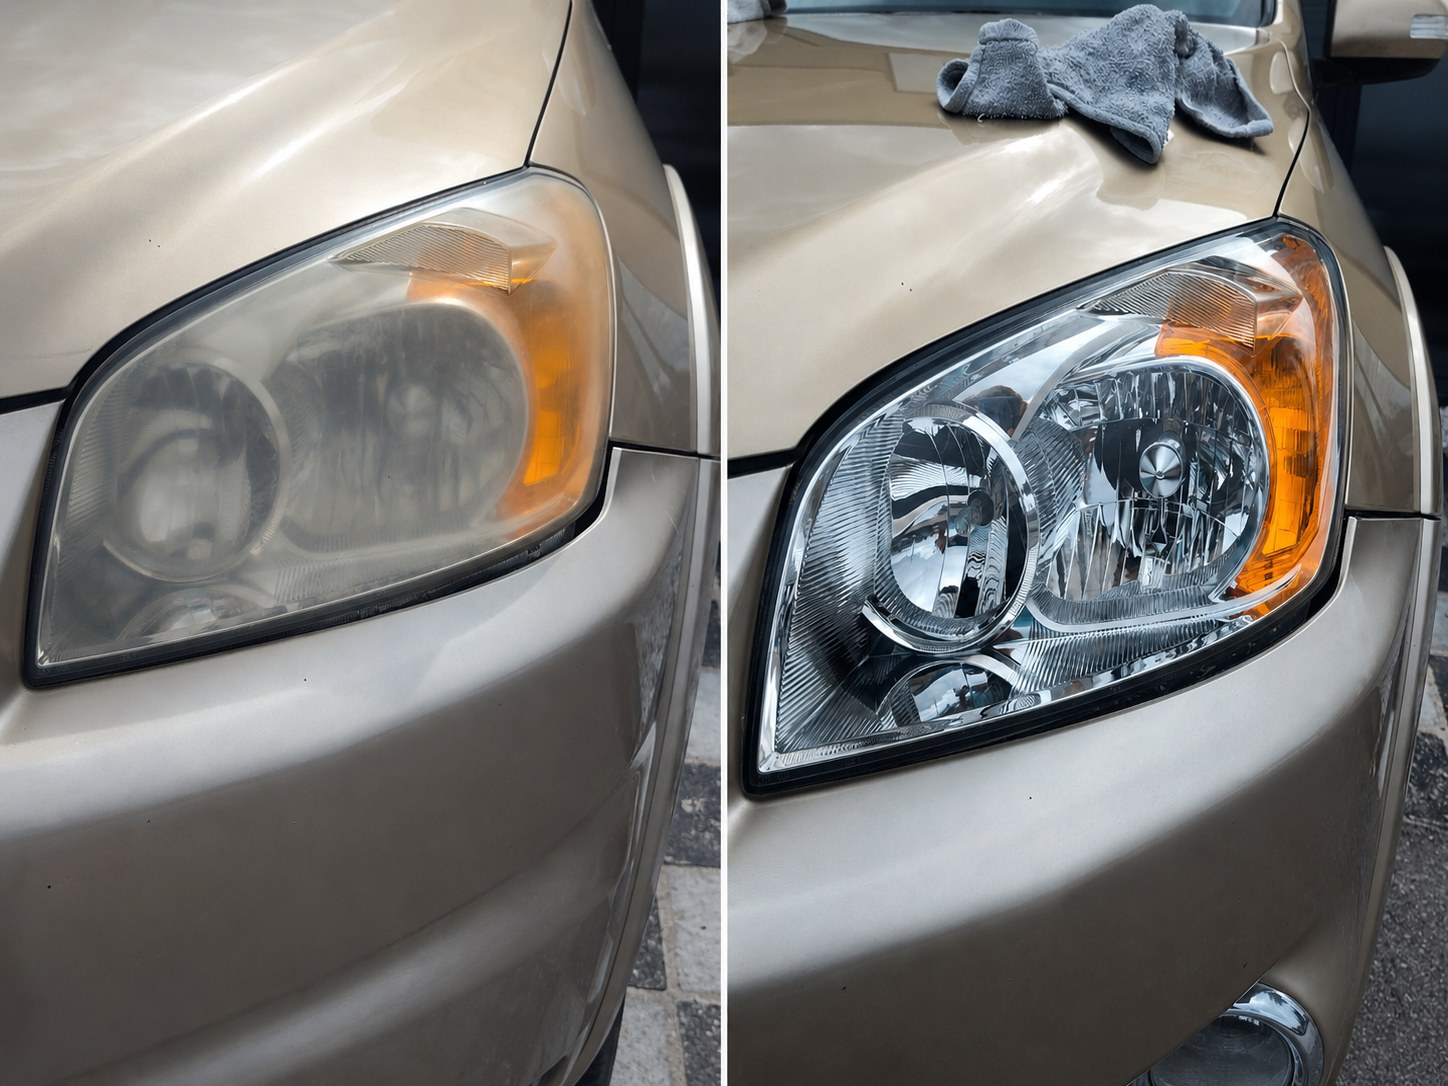
Before · After
-
Inspect and clean
We look over the condition of each lens and wash the headlight and the area around it so we are working on a clean surface.
-
Mask and protect
We tape off the paint and trim surrounding each headlight, so only the lens gets worked on and your paint stays protected the entire time.
-
Wet-sand the oxidation away
Using progressively finer grits of sandpaper with water, we sand off the yellowed, hazy, oxidized top layer of the plastic. This is the step cheap kits skip, and it is what actually removes the damage instead of just hiding it.
-
Polish and refine
We buff and polish the lens with compound until it comes back smooth and crystal clear.
-
Clean and prep for sealing
The lens is wiped down and prepped so the protective coat bonds properly.
-
Seal with a UV clear coat
We finish with a UV-resistant sealant that cures to a hard, clear protective layer. This shields the plastic from the sun so it stays clear far longer than a plain sand-and-polish.
-
Final check
We inspect both sides, pull the tape, and walk you through the before and after. Start to finish, it usually takes about an hour.